Here are the first three finished models in my Kirai crew. When I say finished it means ready for the gaming table. I still have some accessories ordered that will be placed on these bases when they arrive. Until then these are ready to see some gaming action!
Wednesday, December 28, 2011
Saturday, December 17, 2011
On the Workbench - Malifaux Kirai Crew
Work has finally begun on my Kirai crew. If you interested in following along. I will be using video to post some updates as I progress.
Wednesday, December 14, 2011
DIY Clump Foliage for Terrain
Here is a great video showing how to make your own clump foliage for terrain. I actually saw this video before the original one. I really liked the style of this though. I've been following GunBeryl on Youtube for quite awhile now even before he created his second account. Great guy and always very creative stuff. Go check him out!
Monday, December 12, 2011
Nicodem The Undead Pimp
This is the first upload to my YouTube channel in over 8 months. I hope to get adding them regularly again. If nothing else it will be a nice change in sharing my hobby progress with everyone. I would like to start getting some of my terrain tutorials up as well as Malifaux Battle Reports too.
Monday, November 28, 2011
Seamus Vs. Ramos 35 Soulstone Scrap
This was my first game using a master other than Nicodem. I decided to give Seamus and his Avatar a shot. It was certainly different than the undead factory that Nico typically produces. Here is the run down as best I can recall:
Seamus Crew:
Seamus + Avatar
Copycat Killer
Bete Noir
Canine Remains
Convict Gunslinger
Rotten Belle x2
8 Soulstone Pool
vs.
Ramos Crew:
Ramos
Mobile Toolkit
Joss
Steamborg Executioner
Steampunk Arachnids x3
6 Soulstone Pool
Core Strategy: Reconnoiter
Seamus: Claim Jump & My Little Friend
Ramos: Sabotage & Kill Protege (Bete Noir)
I may have some of the strategies and schemes mixed up. I have them written down but not with me.
The first round initiative was won by Ramos and I was not in sync at all trying to find the synergy of this crew. Not much happened in the first round other than moving up, jockeying for position and Ramos gathering scrap and summoning an Electrical Creation. My initial plan was to concentrate on the two quarters of my side of the board as well as the one where my claim jump marker was located. I figured this would give me a good start on Victory Points.

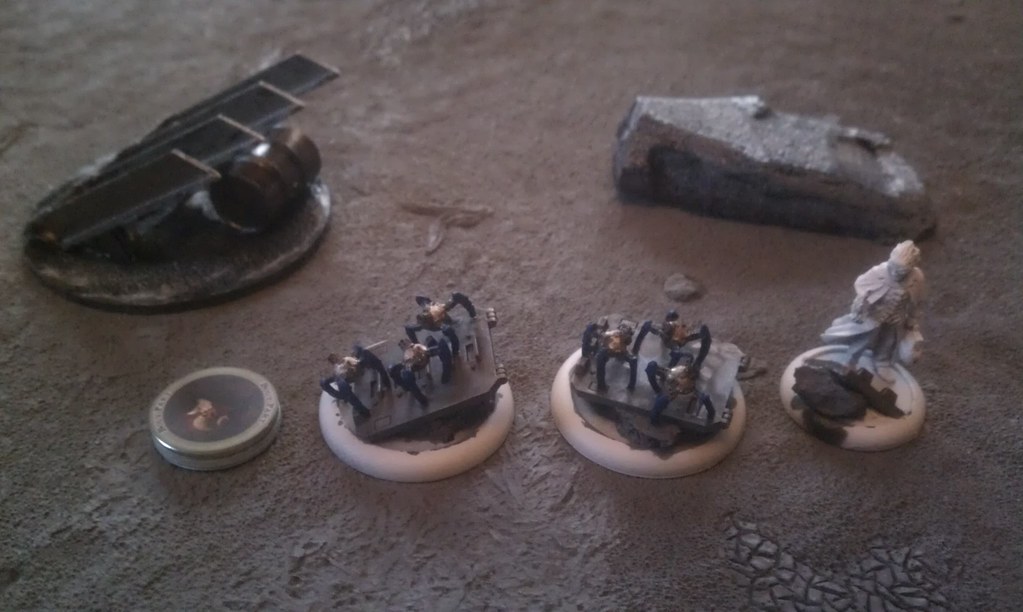
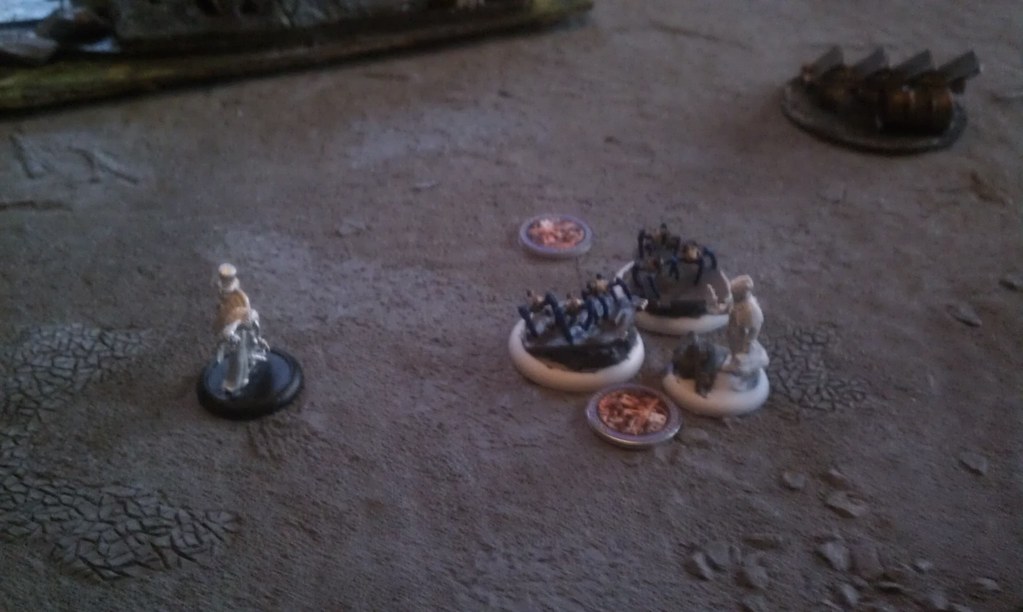
At this point Ramos had two Electrical Creations on the board (one proxy with token) and the 3 original arachnids had joined into a swarm heading toward the side with Seamus and the claim jump marker. He also had moved his Executioner over to sit on the claim jump marker and kept popping his steam fog ability. I had tossed the canine remains into the list as fodder. I figured it could be used to either help summon another belle or a spot to pop Bete up at. You can also see a belle and the convict gunslinger stretched out on the left side here. Lastly, you can just barely make out the base of Joss at the top of the image in the center. Joss was sent to help against Seamus, his totem and a Belle. Both of my belles were mostly used to help drag models into range for attacks on the left and right side of the table. I didn't notice the first round that the true synergy of Seamus and the belles actually worked better with Seamus going first and then activating the belle immediately after. Live and learn!

At this point there had been another arachnid swarm moving up the right side of the picture trying to get to my side for the sabotage scheme. My belle pushed him into range for my convict gunslinger who actually got trigger happy off and killed him in a single activation.

Not much new in this shot. More creations from Ramos and my canine remains is about to go poof from one exploding next to him.

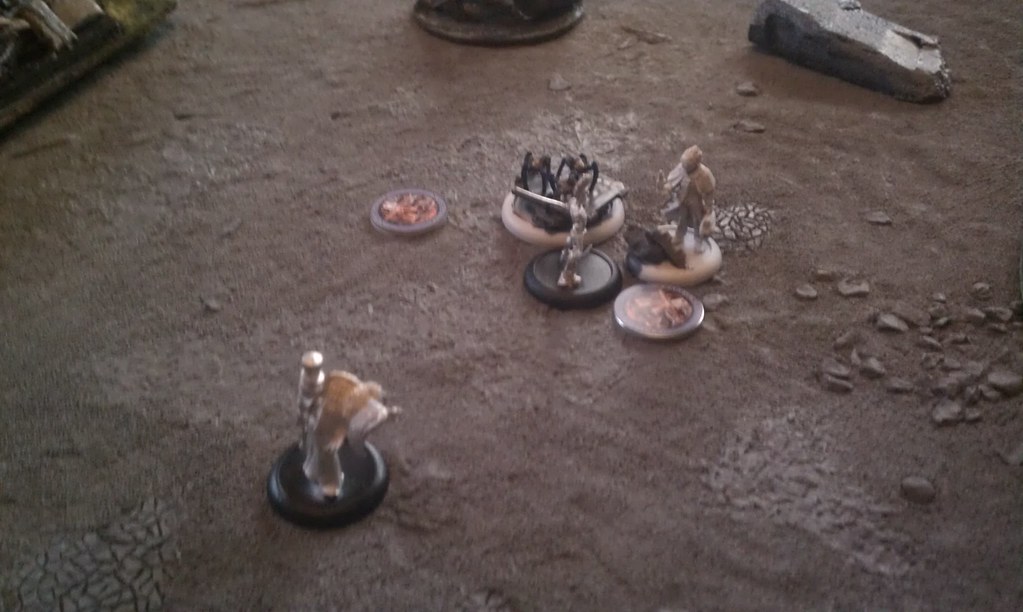
By this point Joss had been taken out by Seamus. I attempted a slit jugular once and my timing was way off. It seemed I was almost always activating him while my opponent had a hand full of cards. I finally just said to hell with it and simply kept attacking him until he was dead. I then popped Bete out at this point to either help me with the Executioner or to head for Ramos.

It turned out things really started going bad for Ramos in round four. I was able to manifest Avatar Seamus who went over and smacked around the Executioner for a couple of rounds before killing him off. Bete made her way toward Ramos and his little creations. I got lucky with Bete's 7 Defense and was able to take down a Swarm with her. By the 6th round Ramos didn't have any significant models on the table other than himself. I moved a couple of models around to give me 3 of the quarters uncontested and the 4th being shared with 1 significant model each.
The final score was 6 - 0 Seamus. I have a lot to learn with this crew but it really was a lot of fun and a nice change of pace.
Things learned running this Seamus Crew:
- Slit Jugular can be vicious if played later in a turn after an opponent has used up their control hand. This is especially true with Seamus and Bete Noir both having the ability.
- Seamus's synergy with the belles seems to work better when he activates earlier.
- The belle and convict gunslinger was a very nice combo on one side of the table.
- The copycat killer wasn't as useful as I had thought. I thought he would be able to do more damage since he had the same gun as Seamus. I didn't notice the 3 Cb on it until the first time I tried to use it.
- Avatar Seamus is fairly easy to manifest by turn 4.
- Focus on strategies and schemes! This is a difficult one for me coming from games where tabling your opponent meant a big win. In this case I didn't focus on killing much until things got near me or in my way to accomplish my own strategies and schemes.
I should be starting to assemble, paint and play my Kirai crew this week though in preparations for my first Malifaux Tournament on December 17th at my local gaming store Gaming Grounds in Kent, OH.
Tuesday, November 22, 2011
Breach Hunter - Charleston, WV

I have created another new series. There will not be an regularity to frequency of posts with this one. Let me first state or remind some readers that I travel a lot for my job. I am going to try to find local gaming stores in the areas that I visit. I will do my best to find shops and share my experience and opinions of the stores options, location and staff of these. The first shop I want to share is the Lost Legion Games & Comics "The Rifleman" in downtown Charleston, WV. They had only been at this location for less than 3 weeks. I didn't see the inside of their old location but from seeing photos of the old store front I would guess this spot offers a lot more room for onsite gaming.
I arrived a few minutes before they opened up and shared a few words with a patron and a staff member out front before going inside. Both were very friendly which is a good sign for anyone looking to frequent this shop. This is a good first impression due to the fact it meant they had no issues with chatting it up with a complete stranger that simply had a common interest in gaming. I will be the first to admit there isn't much worse than walking into a store with an elitist vibe from patrons or staff members that only seem to pressure you into purchasing something and then ushering you out the door. This shop gave off neither thankfully.
I looked around for a few minutes and noticed a wide range of items for sale including: Books, Comics, Magic The Gathering (and other CCG's), various wargaming models and systems including GW, Wyrd Miniatures (both Malifaux and Puppet Wars) and much more!
After browsing for a bit I found myself looking through the Malifaux items and picked up a pack of swap base inserts and swamp base accessories. These two items should be just enough for me to base what I have so far for my Ophelia crew (11 models).
There were a total of 6 full size tournament style wargaming tables available with tons of terrain pieces both on top of the tables (see pictures below) as well as crates of additional pieces underneath. There were also about a dozen or so folding tables that could be used for various things including CCG's. There was also a room in the back that I didn't get a picture of that I think they use for Role-playing games which is really cool!
I proceeded to the counter to make my purchase and asked the friendly staff member if she would mind me taking some pictures for this blog entry. I told her I was from out of town and am just a fellow traveling gamer. She said she didn't mind at all and that the store actually offers a discount for anyone that travels from more than an hour away. I informed her that I was actually from about 4 hours away. I was quite surprised by the discount. Here is how it works: This discount is given to offset the cost of fuel used to travel to the store from greater distances. Fill up your tank, get a receipt and bring it into the store. They will give you 20% off until that percentage of discount equals what you paid in gas. This is a very unique way to give a discount as well as bring in some more customers. Any kind of discount a consumer can receive is nice. At the same time any way to bring more consumers in the door helps a company owner. This is even more important for today's small businesses to survive.
The next thing to mention is they have a Google calendar that can be viewed from their website with a smorgasboard of events! From what I can see they don't have any less than 3 events scheduled for any given day. During the discussion before entering the store there was mentioned of a ton of things scheduled for Black Friday (This Friday 11/25/11).
The last thing I will mention before giving a summary of all things is the location. The spot of the new shop is a very nice looking town. It has a very small town shopping center feel to it which was nice. There were eateries, banks and shops lining the streets with several benches scattered throughout to take a rest on. The only real draw back is navigating this area during rush hours. Downtown Charleston, WV is rather dead from my experiences after about 6:00pm but hitting these streets during the rush hour periods can be nerve wracking if you don't know your way around. Older GPS units can be tricky in the area as well as a lot of road ways have changed in the past few years. The shop is still worth a trip though!
Experience at "The Rifleman":
- Staff 5/5 - There was only one staff member present but she seemed to love the hobby just as much as any other gamer walking through the front door.
- Gaming Space 5/5 - With several tables available for various types of gaming you can't go wrong!
- Products 5/5 - They had a wide range of products from collectibles to gaming and were willing to order anything not currently in stock.
- Events 5/5 - Again their calendar shows the tremendous amount of events taking place at this shop
- Location 4/5 - It is a friendly area but as I said it could be a little tricky in finding your way here with your sanity still intact.
Name: Lost Legion Games & Comics "The Rifleman"
Website: http://www.lostlegiongames.com/
Physical Address: 600 D Street, South Charleston, WV 25303
Phone: (304) 205-7919


Saturday, November 19, 2011
M&SU Workbench - Nicodem
Thanks to my Twitter buddy across the pond James, I have been inspired to start getting some models painted up. I started and finished Nicodem today. I've always thought he looked like the vulture toting pimp of Malifaux so I just had to paint him up in pimp purple. I also added some blood stains to the vulture's beak. I changed how I did my floor boards too and am much more pleased with this out come. If you have any questions on how I did anything or what colors I used, feel free to ask.


Wednesday, November 16, 2011
M&SU Workbench - Guild Autopsy


I experimented multiple times with trying to find an undead skin color and eventually gave up and settled for the one used in these pictures. It ended up being a Vallejo Model Color Light Grey with s very small bit of Vallejo Game Color Goblin Green. I finished it off with a GW Sepia wash just to try and highlight some of the details. I have since ordered the Reaper Triad Undead Skin pack and will be using it on my next models.
The trench coats were painted using Vallejo Model Air Dark Grey Primer then highlighted using the above mentioned VMC Light Grey. GW Badab Black was used to add further shadows and then GW Devlan Mud was added in multiple layers to add the dirty bottom effects. VGC Bloody Red was used for the cuffs and trim to the coats.
The Boots were VGC Leather Brown with some shading of Leather Brown with a drop of VGC Charred Brown. These also received the GW Devlan Mud wash when the coats were done.
The bases were created using wooden coffee stirrers to make the wooden floor planks and cork was used to make the earth ripped from the ground underneath the floor boards. The wooden planks aren't quite where I want them to be. I simply did a couple of layers of Devlan Mud wash at this point. I think I may go back and actually paint them to try and mimic floor boards a bit more. The cork was based with the previously mentioned VGC Charred Brown and then dry brushed with progressively lighter Charred Brown using VGC Earth. I am fairly happy with this effect and only want to add some simulated roots coming out of the cork at this time. I think I may try floral wire painted a light brown and see how that looks.
The only thing I wanted to mention that is hard to see in the photos are that the pistols and the blade (which was reversed compared to most models) actually have a rust wash added to them to make them look old and unused as well.
Saturday, November 5, 2011
M&SU Workbench - Malifaux Counters
The scratch build and homemade alternatives in the wargaming hobby is what originally got me into table top gaming in the first place. Last year I was running a fairly successful and popular Youtube Channel that shared some of my homemade cheaper solutions to things as well as my painting and battle reports. In the end the channel just became more of a second job for me and the fun of it was lost somewhere along the way. The wargaming community itself has always been great to me and I am hoping I can still feel a part of that community with this blog, but without the stress and demand that I had with my video channel.
My personal goal for this channel and my other D&D channel is to attempt to post at least once per week on each. This week I am actually posting two with a third very possible as I am working on several things. Last weekend I created some Corpse and Scrap counters for me and my friend Keith for our Malifaux game. I thought I would post an entry here explaining how I made those counters. This will be the first post in my M&SU Workbench series which will feature scratch builds, homemade solutions and terrain building.
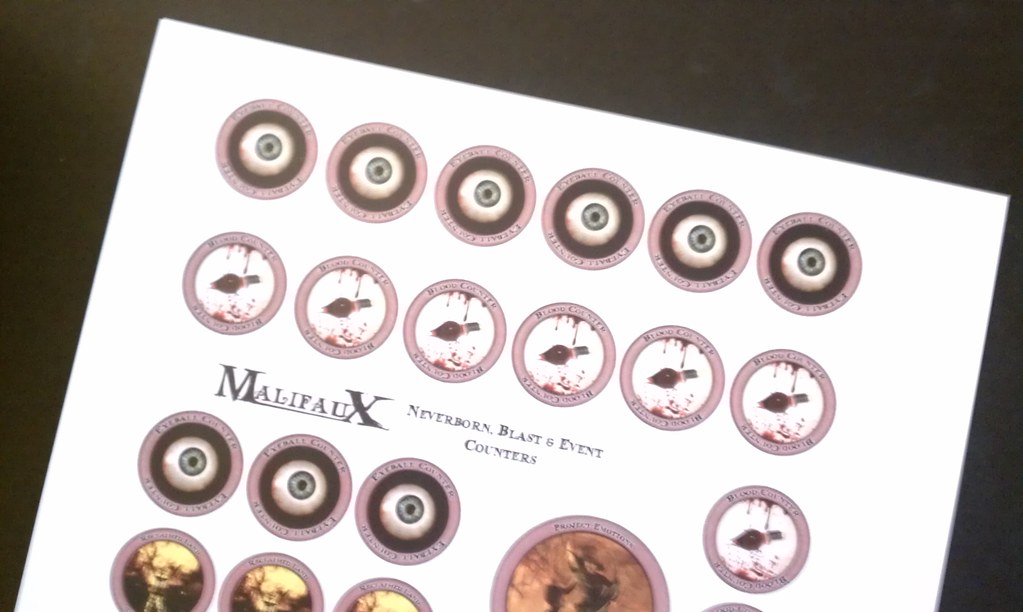 |
| Ratty Counter Print Page |
I started by printing out duplicates of the Ratty Counters. For this example I am going to create a counter that will have a Blood on one side and a Power on the flip. I needed the smaller counters to print out into 1 inch size which I will explain in a later step. It took me a few test pages before I got the size I was looking for. I started by shrinking the page to fit printed area and then had to manually shrink the page to 94% of that. You may have to mess with your print settings to get the desired size you want. I printed my test pages on regular paper. Once I got the size right I then printed my counters onto photo paper which gives a crisp and clean look to the finished product.
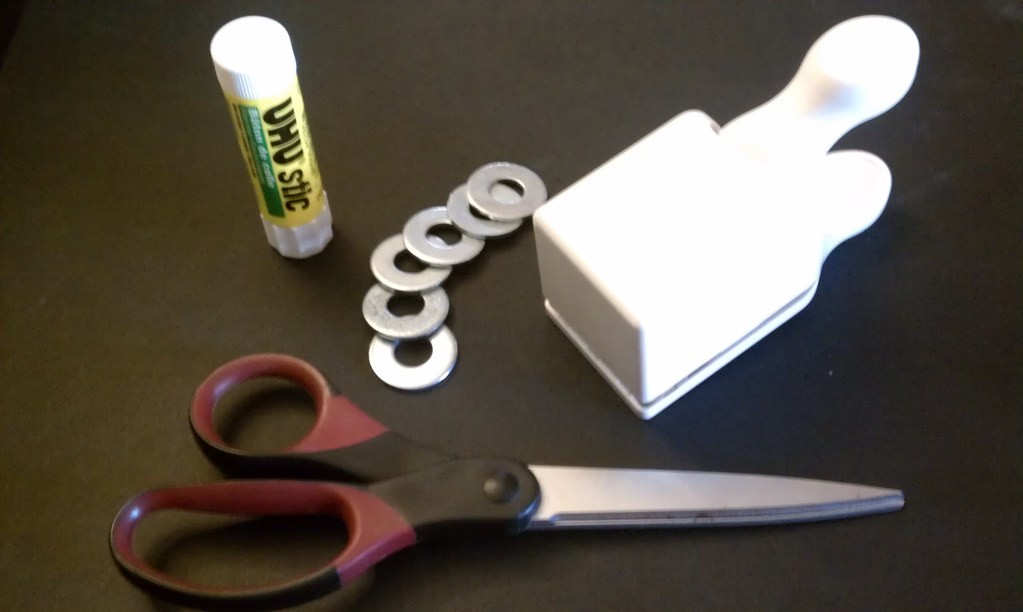 |
| Glue Stick, Washers, Scissors & Hole Punch |
The only other things I used was a Glue Stick (UHU Stic), 1 inch Outer Diameter metal washer, scissors and a 1 inch hole puncher.
- Glue Stick is easy to control and does not over saturate the paper token to cause warping or wrinkles.
- Scissors are used to get at the tokens on the printed sheets easier. Only used for rough cutting.
- I chose the metal washers because they just seem very durable. I have used plastic ones for D&D tokens and they work well too but I never have to transport them like I plan to with these.
- 1 inch hole punch is used to cut the counters out of the printed sheets. Just make sure you get the same size washers to match the hole punch.
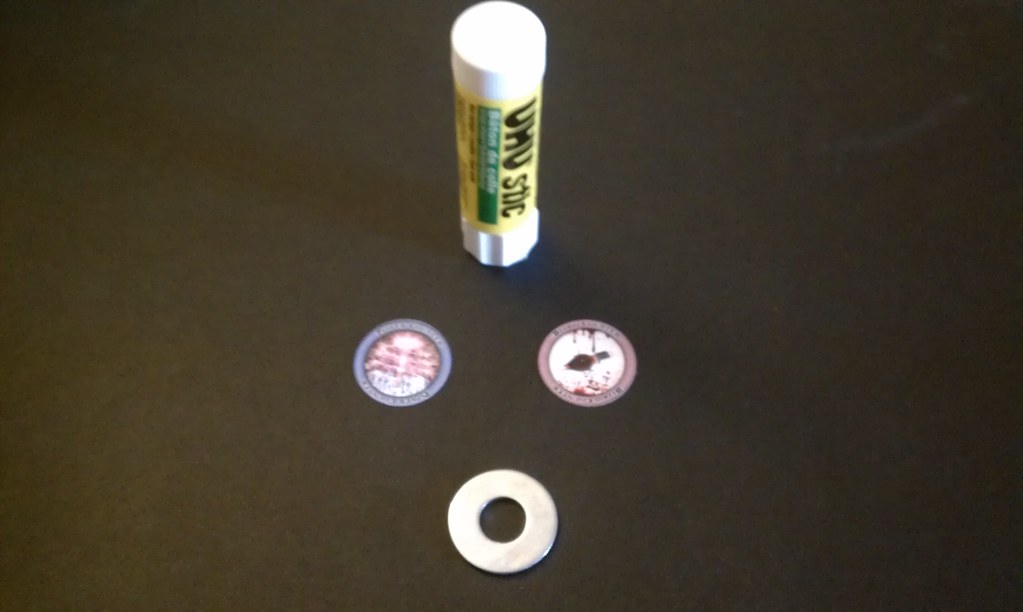 |
| Glue Stick, 2 punched out Counters and washer. |
Once I cut out a couple of strips of counters from the printed sheets for ease to get at, I punched a Power and Blood counter for each side. Now all I have to do is glue the counters to either side of the washer and wait for it to dry.
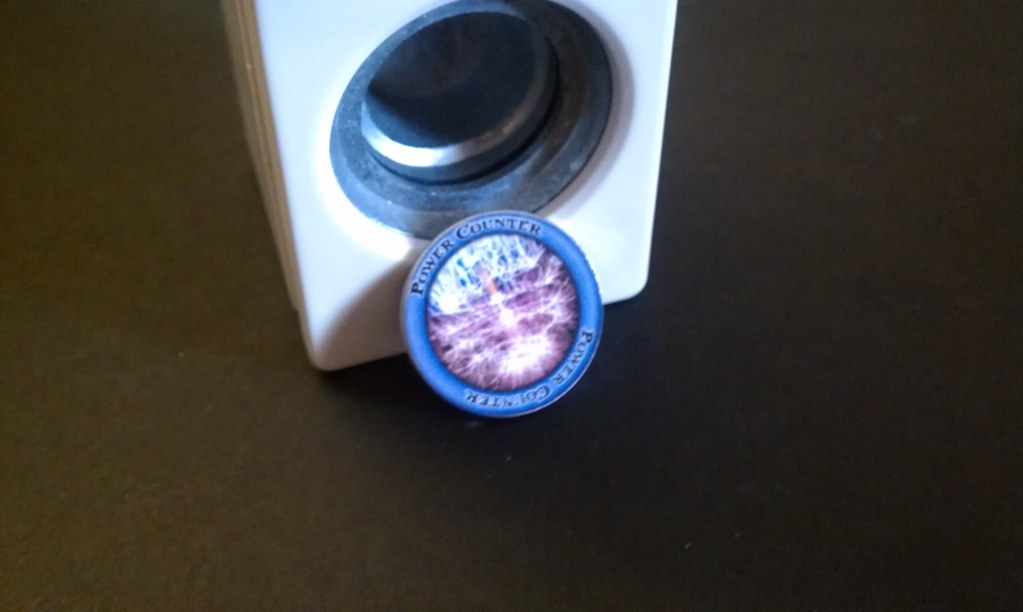 |
| Power Counter Side (and a closer look at the hole puncher) |
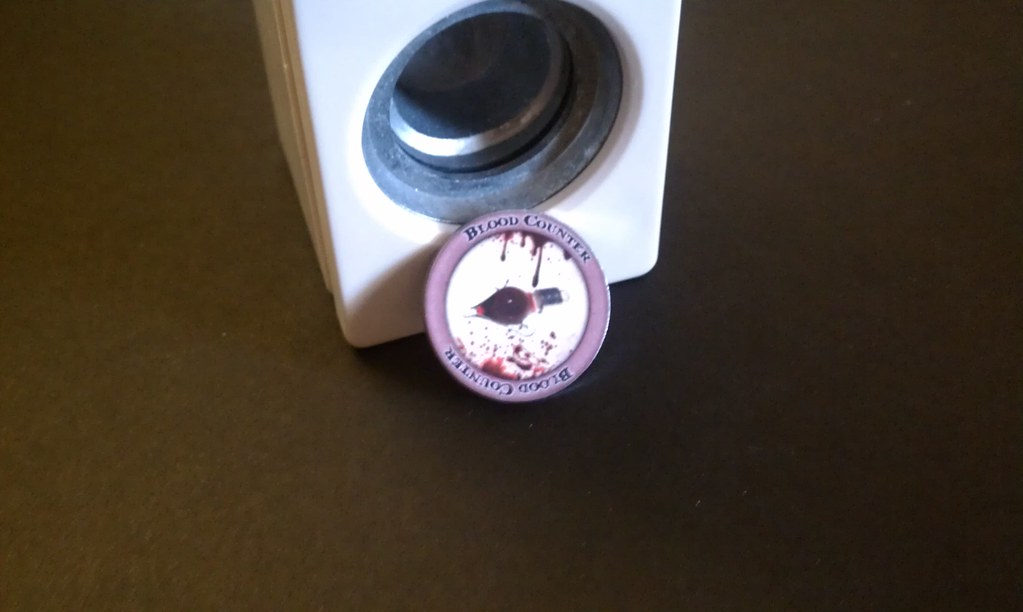 |
| Blood Counter Side |
I hope this tutorial helps someone else either in making their own this way or simply inspiring someone to do something differently on their own.
Wednesday, November 2, 2011
First Semi-Official Game

I have been itching to get some gaming in and talked a life long friend of mine into giving Malifaux a shot and we got together this past Sunday and had a lot of fun. Since neither of us had any experience we didn't even go with an actual box set and simply picked out 9 points each to accompany his master Ramos and mine Nicodem. We added 3 soulstones each against just to practice using them in the game as well. He ended up pushing 3 Steampunk Arachnids and Ramos to begin versus my 2 Canine remains and a Samurai Zombie with Nicodem.
 |
| Ramos and 3 proxy single steampunk arachnids |
 |
| Nico, Punk Zombie and 2 Canine Remains |
Things went slow and stead at first. We simply lined up approximately 15 inches from each other on the table. Again this wasn't an official game. We just wanted to go through the motions of the stages and see how things worked. Models were quickly dropped creating scrap counters and corpse counters. Things went fairly well as we got familiar with movement, melee and spells. There were a couple of things we came across that we couldn't find a clear interpretation of the rule so we made a house rule agreement and moved forward to revisit later.
 |
| Canine Remains gone and 2 Arachnids gone. |
We played for a total of 3 hours and various models were brought back into play time and time again and we had a lot of fun. We wrapped things up as a draw due to prior engagements.
 |
| Mindless Zombies already came and went. This is actually Ramos and a single arachnid. Nico and a Flesh Construct proxy. |
I then tossed out a couple of questions to the online Malifaux community, Twitter specifically and of course got almost immediate responses. From my experience the Malifaux Twitter community is still fairly small. If you use Twitter and play Malifaux don't forget to use the #malifaux hashtag from time to time to show your support for that community. I follow that hashtag and am regularly keeping tabs on those discussions and find new gamers to follow as well.
The main thing I learned was make sure you are using the v2 cards. That would have answered some of our questions from our game. We had the v2 cards printed out but I didn't notice they printed wrong and several of the text areas were messed up and eligible.
I want to give a couple of thanks to those that did respond to my questions:
Damian @LordShaper
CerealKiller @CerealK195
Rand @RandEaton
Some of the things I wasn't certain of were the following:
We weren't sure if Ramos' Counterspell ability only worked when he was the initial target or if he could use it when affected by a blast. It turns out we over thought the wording of the ability and it clearly states that it can be used when he is "targeted".
I also had some confusion regarding Nico's Reanimator spell in regards of which models he could summon using it as well as I used too many corpse counters for the Flesh Construct that I reanimated.
The last thing I researched was I found out we were forgetting to pay attention to the difference of duel end results to apply the bonus damage when available.
It was a great learning processes for both of us. Though I read a lot of blogs and listen to a lot of podcasts to pick up information, it doesn't compare to actually playing to get a good feel for things.
Thursday, October 20, 2011
 |
| What's In The Soulstone Bag? #2 |
I am constantly looking for new information and tactics on the web regarding Malifaux. I find more blogs and twitter accounts to follow almost daily. I think one of the best additions to my arsenal of reading material though has been the Pull My Finger Wiki for Malifaux. I have been spending about a hour a night on average simply following one link to the next to see what they have for each model. There is just an amazing amount of information there already and continues to grow. I really like the fact that they found a way to have all of this information without actually posting rules and statistics that could be seen as copyright infringement.
Anyways, after reading several areas throughout the Arcanists and Tina's pages I decided to order an Essence of Power to increase the efficiency of her spells. I also ordered my first Silent One (probably with another or two in the near future) to give Tina some decent to use her Ice Mirror with. Lastly, I ordered the Snow Storm model to increase mobility threats. Not to mention I think it is a gorgeous looking model.
The only downfall I have for any of these models is the fact that the Snow Storm is a large resin sculpt and from what I have seen of it out of the box already it is going to need a lot of clean up and prep work before it gets painted. There is quite a lot of flash present that needs removed carefully due to the amount of detail in the models fur.
All in all I think these models will be great additions to my Rasputina crews. I also finished my first winter themed base on a different model so I feel more comfortable doing all of these with the same technique.
Wednesday, October 19, 2011
Review of the Malifaux Rulebook

Let me get a couple of things out of the way first. Initially I want to let anyone reading this know that out of respect for Wyrd Miniatures I tried to include pictures in this post that would not cause any loss of product sales such as pages that would include actually statements of rules and such. However I did want to give a couple of examples of what you will find in this book. In all honesty it was this book alone that first steered me toward the Malifaux game.
With that being said I thought I would also give a brief description of how I came to be interested in Malifaux. I only started miniature wargaming just last year (2010). I quickly got addicted to both the hobby side and the gaming side. Though due to the amount of time I spend traveling for my job the hobby side typically receives much more attention than the gaming does. In about 4 months I had spent way too much money in building 2 Warhammer 40K armies. By January this year I had begun looking for an alternative that would feed my gaming and hobby addiction but at a smaller scale. I narrowed it down between Warmachine/Hordes and Malifaux. In the end it was the different feel in style all together to Malifaux that interested me more so I pulled the trigger and ordered two crew box sets (Ramos and Seamus) as well as the original rulebook and the Rising Powers which had not been out very long. All four items sat in my den until late August. I think the combination of having some free time again, as well as an additional new local gaming store opening up by my office, finally got me to pick things back up and get into this game.

I had leafed through this rulebook a couple of times but only recently picked it up and read it from cover to cover. I figured if I am going to get playing these models I might as well get familiar with the general rules and the rules of the models I owned at the time. At first I tried to read the book from beginning to end and that just seemed to confuse me. If you haven't opened this one up yet let me warn you that there are rules and fluff (world setting back story) scattered all over the place as you go through it. This isn't to say there isn't an order to it but you will find stories breaking up rules several times. So I decided that I would go through and cherry pick all of the rules first. That seemed to work as I went through and seemed to have a much better understanding of the rules by doing this. Once that was finished I circled back around and just finished reading all of the fluff stories this morning. I have to say the stories made me appreciate this world/system even more. So much I have already began looking for novels with a similar feel to read after finishing the three Malifaux rulebooks.
The book has a lot of great material whether it is the rules, the storyline or even the glossary or quick reference pages in the back. Overall I really enjoyed reading this and feel that the rules were laid out in a way that is fairly easy to understand.

The game itself differs in so many ways from the typical miniature wargaming system but to me the major way is the use of cards that control the fate of everything you do rather then rolling 20+ six sided dice across the table. The miniatures are gorgeous. Each model has its uses and various styles of play. There are dozens of different game setups and uses of terrain which make almost every game you play different from the previous ones.
The only thing I have to do now it control myself from buying any more models until I get the crews and solo's painted up that I currently have. Well after I pick up my Seamus alternate and avatar this weekend of course...
***NOTE***
As was mentioned in the comments below the rule set found in the original book here is outdated. You can find the v2 character cards as well as other useful tools at the Malifaux Downloads Page.
Saturday, October 8, 2011
What's in the soulstone bag? #1
I have decided to make my first reoccuring topic today. What's in the soulstone bag is going to be an update of purchases as I continue to build my crews, my collection and my most recent addiction of Malifaux.
I don't currently have a set gaming budget but I may need to establish one after this week. What I am about to share are only the purchases that I made at the local shop or that have arrived in the mail at the time of posting. I still have a couple of things in transit.

As I am building my first two factions of Arcanists and Resurrectionist I picked up the Rasputina and Nicodem boxes. These will be nice additions to the Ramos and Seamus boxes that I purches back in January. I also picked up a copy of the newest rulebook Twisted Fate to round out my set which already consisted of the original and the Rising Powers books. I plan on doing a personal review on the original rulebook some time soon. I realize this won't be recent news for the system or hobby but I just want to voice my opinions on the books layout and content. Look for that in the next week or two.

The next purchase made this week was towards obtaining some counters. After surfing the web for various gaming counters I stumbled upon the Chessex brand gaming counters/tokens which were nice looking glass beads. The down side is they are fairly pricey at $5 and up for 25 to 40 counters. I knew I had seen similar items somewhere. I thought for sure I could find something similar to use at craft stores using some type of glass or plastic bead but then I saw a picture of aquarium gems and they looked almost identical to the gaming counters I had previously seen. I did some shopping online and at local stores and found the ones pictured above for less than $2 per bag at a local pet supply store. I haven't counted the number of them in the bags yet but I would say they are easily 40 or more which is less than half the cost of similar count name brand gaming counters. I wanted the dark blue and green so I could have a color to represent both of the factions I am building but they didn't have green. Of the colors currently available I ended up with the teal, cobalt and ruby colors pictured above. These will represent soulstones, tokens and counters until I figure out how I plan to print out and use the awesome looking ones that Ratty has come up with. I am thinking of printing them on regular paper or card stock and mounting the cutouts onto foamcore. I just haven't quite decided yet.
The only other notable topic is the fact that I am beginning to grow a nice relationship with a brand new local gaming store in my area named Gaming Grounds which has only been open about a month now. I like the fact that it is only a 5 minute drive from where I work and they open at noon. I can go in there a couple of times a week on my lunch hour and just see whats new, talk gaming with the owner and discuss product orders and new releases. I think that concludes this What's in the soulstone bag for today. I have some resin bases and clam shell packs yet to arrive but once they get here I will share!
Wednesday, October 5, 2011
Miners and Steamfitters Union Established

The first set that I have begun working on for my Malifaux crews is the Arcanists - Ramos box set. This is the set that comes with Ramos, 1 Steamborg Executioner Class and 6 individual Steampunk Arachnids which I believe are typically built as two Steampunk Arachnid Swarms. This was one of two box sets that I originally purchased back in January and have only just recently dug into with a strong desire to get some games in.


What I ended up doing (if you can't already tell) was raid my Warhammer 40K bits boxes and found a couple of Rhino doors. I added that and some basic cork to the bases to hopefully end up with a slightly more original and less seen base once on the table. I may still add some battle damage to the doors as well. I haven't decided just yet.

Once I was happy with the models and bases for the arachnid swarms I move onto Ramos. This one was very easy to assemble which only included two pieces (minus the base). I had to straighten the flame slightly after the glue had dried but was happy with the end positioning. To follow similar suite with the arachnid swarms I cut off another piece of Rhino door and planted this one so that it looks like it is coming out of the ground. There will of course be more basing materials such as stones and flock that will cover it more.

The last item in the set is the rather large Steamborg Executioner Class which is housed on a 50mm base. I have ordered a custom base for this fella which is why he is simply resting on the stock one pictured here. I also have not attached his arms until his new base arrives and I see just exactly what his positioning will be.
All in all I am quite pleased with the quality and detail found in the Malifaux miniatures line. I honestly can't wait to get some of these crews assembled and painted so I can begin playing some games!
Sunday, October 2, 2011
Introduction to the Breach

In an effort to keep my blogs organized and fairly clean with pertinent content, I have created this one to share my table top experiences.
Last year I entered the table top wargaming world with Warhammer 40,000 and there will probably be some posts about that found here in the future.
My current foray into the table top gaming systems though is Malifaux. The models originally drew me to the game back at the beginning of the year. I purchased two box set crews and the first two rule books. I have recently come to learn there is a new one called Twisted Fate which I plan to pick up some time in the next couple of weeks.
I began work on my Ramos box this weekend. I have Ramos and both Arachnid Swarms assembled and put on their custom decorated bases. I also have the Steamborg Executioner mostly assembled but am waiting for his resin base to arrive before finishing his assembly. I need to know exactly how he will be positioned before I attach his torso and arms.
I have yet to play a game but the system is being played in two local shops and seeing how I have the beginnings of two separate crews I should be able to easily find a friend or two willing to try it out. This is one of the things that appealed to me about the game. You didn't need to drop several hundreds of dollars into getting started as you do with some of the larger scale army wargame systems. Honestly for around $100 you can have two solid crews and the rulebook and be on your way.
I will be sharing my modeling, gaming and product review experiences in posts to come.
Subscribe to:
Posts (Atom)